Bank transfers
Under Payment entry, you will find a range of different bank transfer types in konfipay. The form and its functions are identical for all transfer types. A special case is the cross-border payment, which is described in more detail further down on this page.
List of transfer types
Select the desired type and payment method from the drop-down menu at the top of the page.
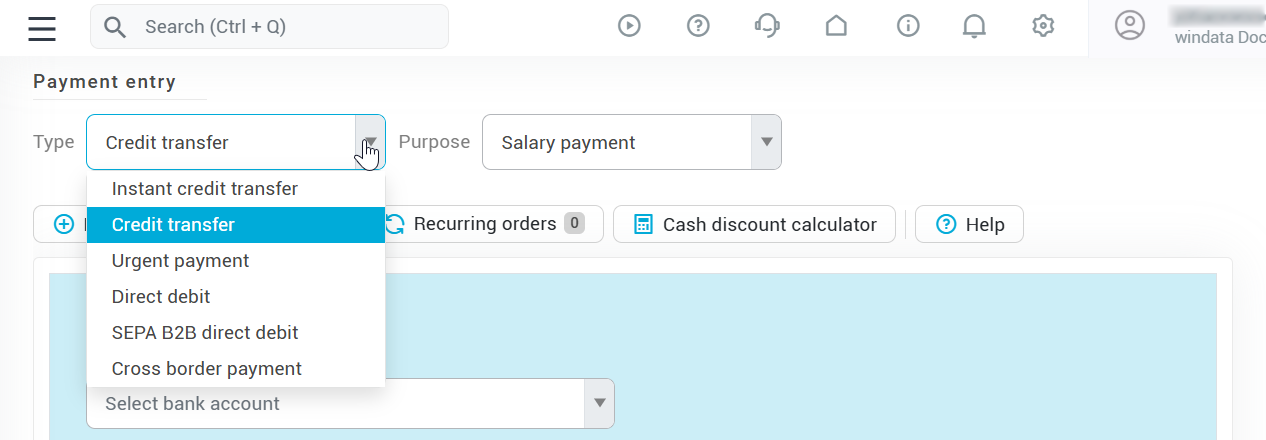
The various transfer types differ as follows:
Designation | Description |
|---|---|
Payment | Standard SEPA transfer |
Instant payment | SEPA Instant Payment |
Urgent payment | SEPA express credit transfer (CCU) |
Salary payment | SEPA credit transfer with SEPA Purpose Code "SALA" |
Capital building payment | SEPA credit transfer with SEPA Purpose Code "CBFF" |
Charity payment | SEPA credit transfer with SEPA Purpose Code "CHAR" |
Cross-border payment |
Furthermore, you can select the following payment purposes for all transfer types (except cross-border payments):
Designation | Description |
|---|---|
None | Executes the previously selected transfer type without any further additions |
Salary payment | SEPA credit transfer with SEPA Purpose Code "SALA" |
Capital building payment | SEPA credit transfer with SEPA Purpose Code "CBFF" |
Charity payment | SEPA credit transfer with SEPA Purpose Code "CHAR" |
Filling out a transfer
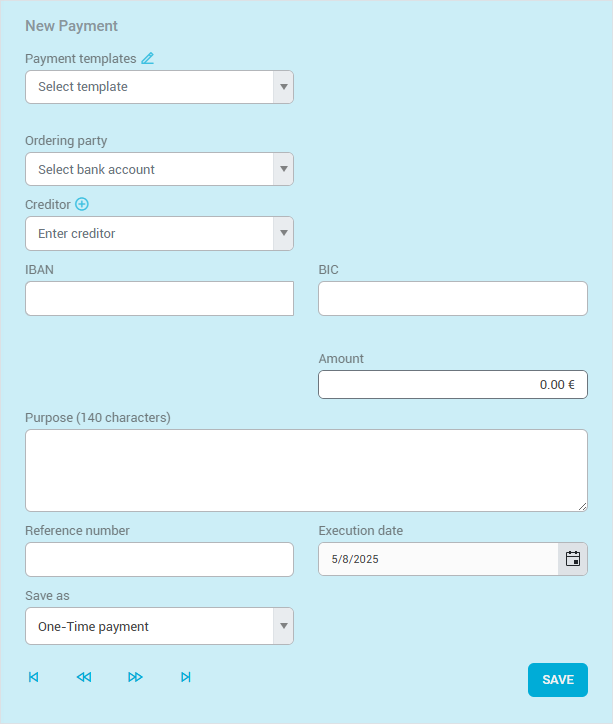
Start by selecting the ordering party of the transfer from the drop-down list. The ordering party is the bank account from which the payment is to be sent. If one of your bank accounts is not displayed in this list, this means that the account does not support the respective transfer type.
Select the creditor from the drop-down list of existing payment partners. If the recipient has not yet been created as a payment partner, you can also enter their account details yourself. To do this, click on the "Plus" symbol next to “Creditor” and enter the details.
If you would like to make a simple one-time payment, select the One-time payment option in the drop-down menu under “Save as”. You can find more information on templates and recurring payments further down in the article.
Create payment template
You can save a payment as a template by filling out the transfer form as usual, but selecting Template at the bottom in the “Save as” drop-down menu.
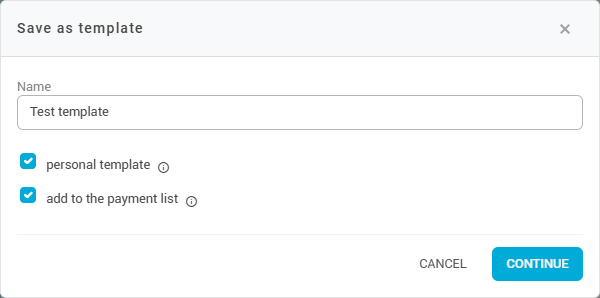
Then give the template a name and specify whether it should be saved as a personal template - then, only you personally can see the template. Otherwise, all members of your client with the corresponding rights will see it.
Also select whether the template should also be added to the payment list. In this case, a payment is created directly alongside the template, which appears in the payment list and can be transferred to the bank.
You can manage saved templates by clicking on the pencil icon at the top of the payment form under “Payment templates”. You can then rename and delete templates:

To change templates, open them in the payment form and change the corresponding data. Then click on the small arrow next to “Save” at the bottom right and select Overwrite payment template.
Recurring payments
If you regularly make a certain payment, you can also save it as a recurring payment. The payment is then created repeatedly in a set cycle.
Recurring payments are not executed automatically, but only created automatically. These payments must then be executed manually from the payment list.
To do this, fill out the transfer form in the same way as when creating a template. At the bottom under “Save as”, select the Recurring payment option in the drop-down menu. After clicking on Save, you can further configure the recurring payment.
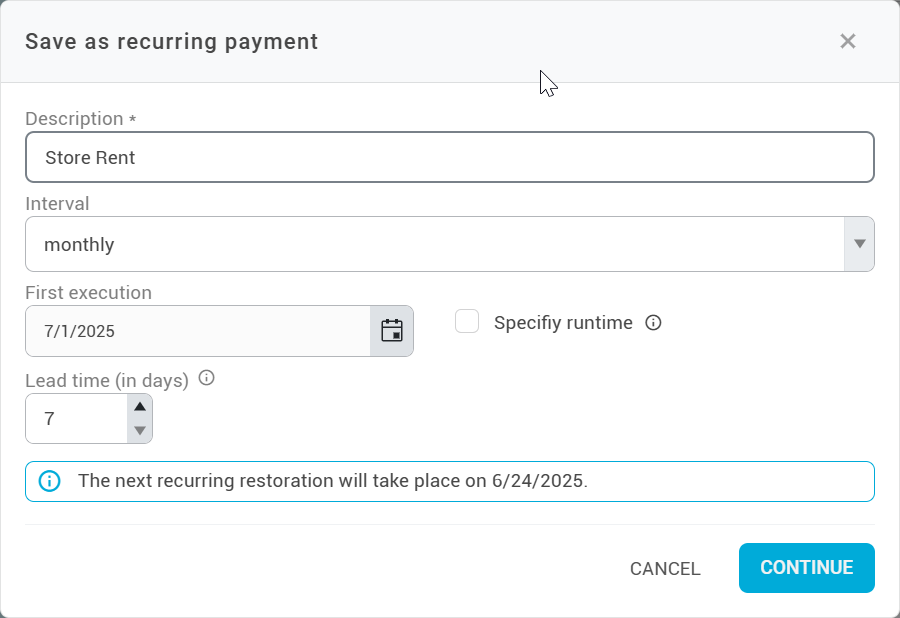
Enter a description for the recurring payment and specify the interval at which the payment is to be created. The first execution is the date on which the payment is created for the first time. The lead time is the period of time before the due date in which the payment is created. If, as in the screenshot, the first execution is on 07/01 and the lead time is 7 days, the payment will therefore be created automatically on 06/24.
If you specify a runtime, you can define the date up to which the recurring payment should be created. When the runtime ends, the recurring payment is deactivated and can only be reactivated manually once the runtime has been extended.
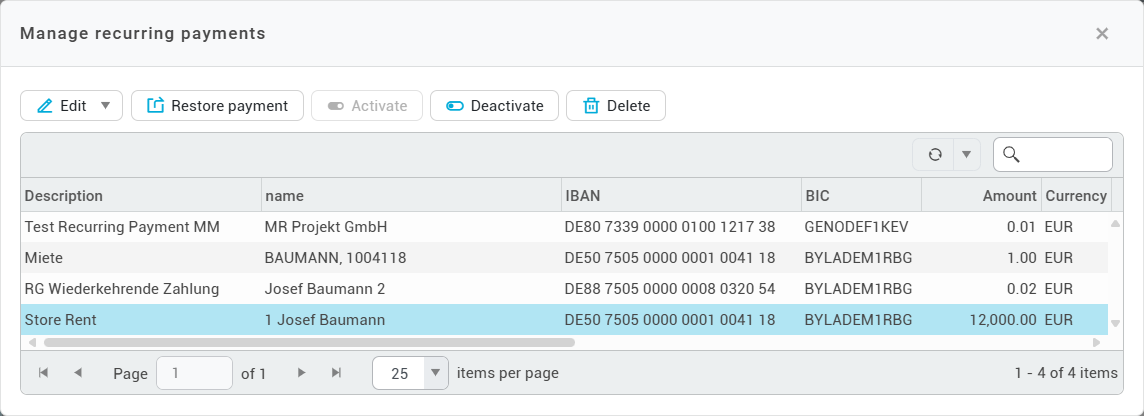
To manage your recurring payments, click on Recurring payments in the toolbar of the transfer screen. You can then edit the details of the payment, activate or deactivate the payment and delete it. With Restore payment, you can also immediately create a single payment that corresponds to the recurring payment.
Save payment as a draft
If you want to save a payment as a draft, you can leave the amount at 0.00 euros. When you click on Save the payment file is created and added to the payment list, but not yet transferred to the bank.
Payment list and file transfer to the bank
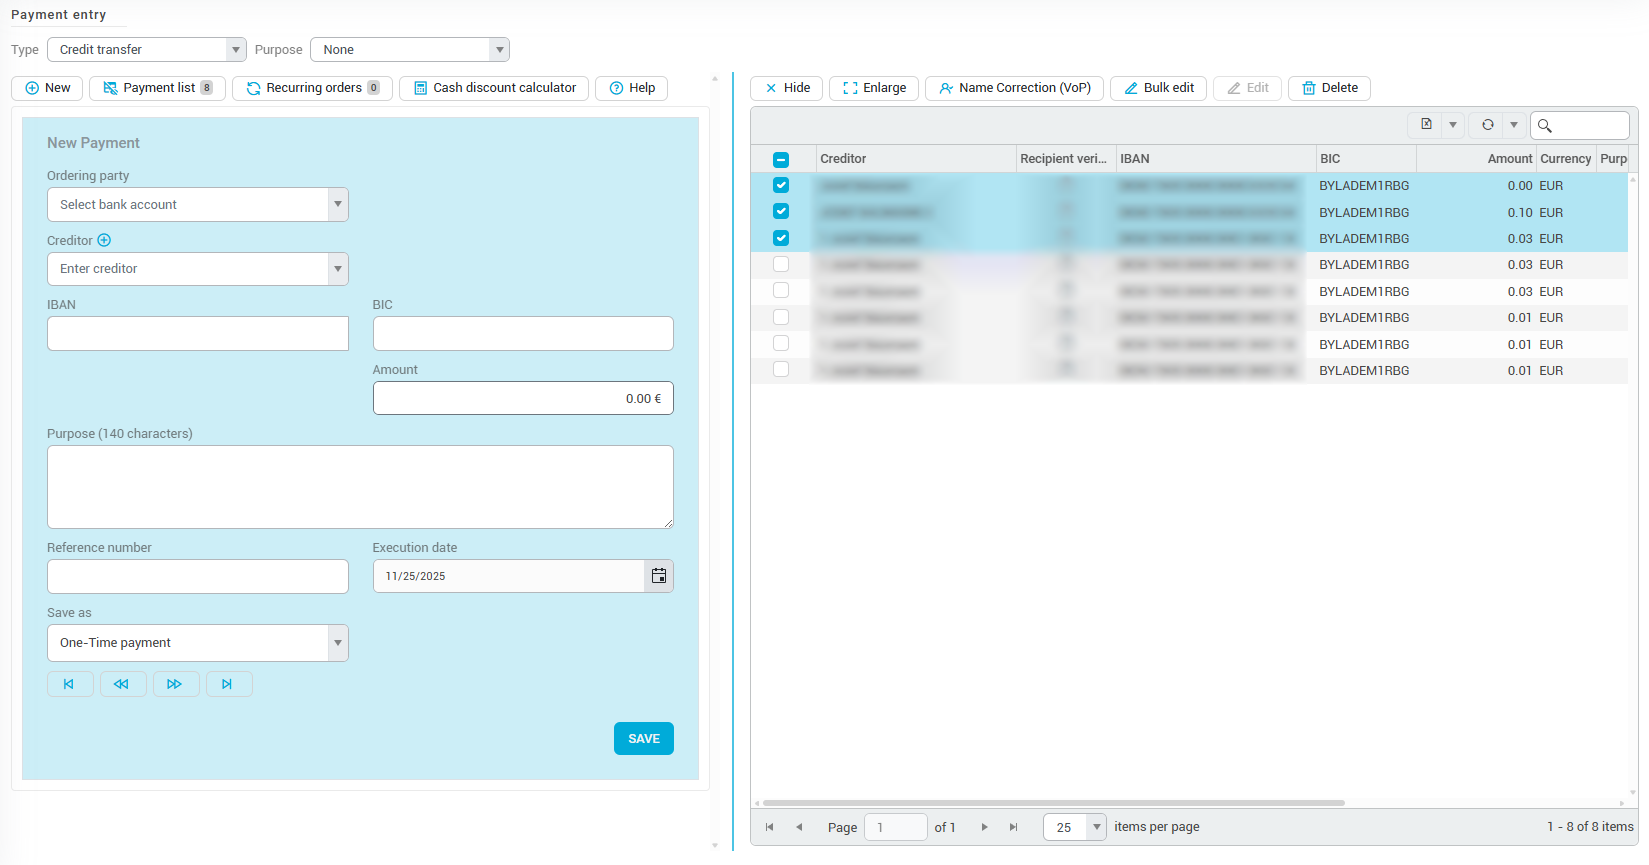
The payment list is located on the right-hand side of the view. All saved, but not yet transferred payments of the selected transfer type are displayed there. If required, you can also select the saved payments again and change or delete them.
You also have the option of making bulk changes, which allows you to edit a group of saved but not yet transferred payments at the same time. To do this, select the relevant payments and click on Bulk Edit in the right-hand toolbar. Then select the fields you want to edit by checking the corresponding boxes and enter the desired changes. These will then be applied to all selected payments.
To transfer manually created payments to the bank, visit Execute > Submit payments.
Cross-border payment
The form for cross-border payments differs from other credit transfers because different requirements apply to the information in a payment for cross border payment transactions (outside the SEPA area).
Please note that you can use two different formats for international transfers - the ISO 20022 format and the DTAZV format are available. To switch between the formats, click on File format in the menu bar at the top and select the desired format.
According to the German Banking Industry (DK), the DTAZV format will no longer be the DK standard from November 2026 and will be replaced by the ISO 20022 format. Please make sure to switch your processes to the ISO 20022 format by then to avoid complications during the transition.
Cash discount calculator
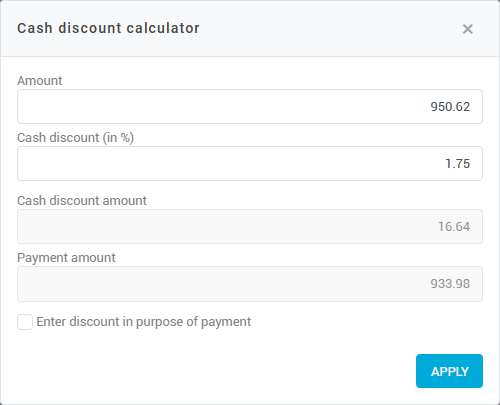
If you are granted a cash discount by the creditor of a bank transfer, you can easily calculate the amount with the discount calculator. First, click on Discount calculator in the top left of the toolbar. Enter the original amount at the top and the discount as a percentage below. The discount calculator then automatically calculates the discount amount and offsets it against the original amount. Click on Applyto transfer the calculated discounted amount to the amount field of the transfer.
If you check the Enter cash discount in purpose of payment checkbox, information on the cash discount will also be transferred to the reference line of the transfer.
Configure view of transfer page
Depending on your requirements, you can also hide or enlarge the transfer form on the left-hand side or the payment list on the right-hand side.
To hide the payment list, click on Payment list in the top left-hand corner of the toolbar or on Hide in the top right corner of the toolbar. To display the payment list again, simply click again on Payment list.
To hide the transfer form, click on Enlarge in the top right-hand corner of the toolbar. To display the transfer form again, click on Reduce.
