
Under "Submit payments", you can transfer manually created payment orders to the bank.
Selection of files
In the upper table, the payment orders are grouped by payment type and ordering party account. You can select one or more groups of payment orders that you would like to transfer. You will then find the individual payments from the group listed in the lower table. If you do not select a group, clicking on Transfer will automatically transfer all outstanding payment orders.
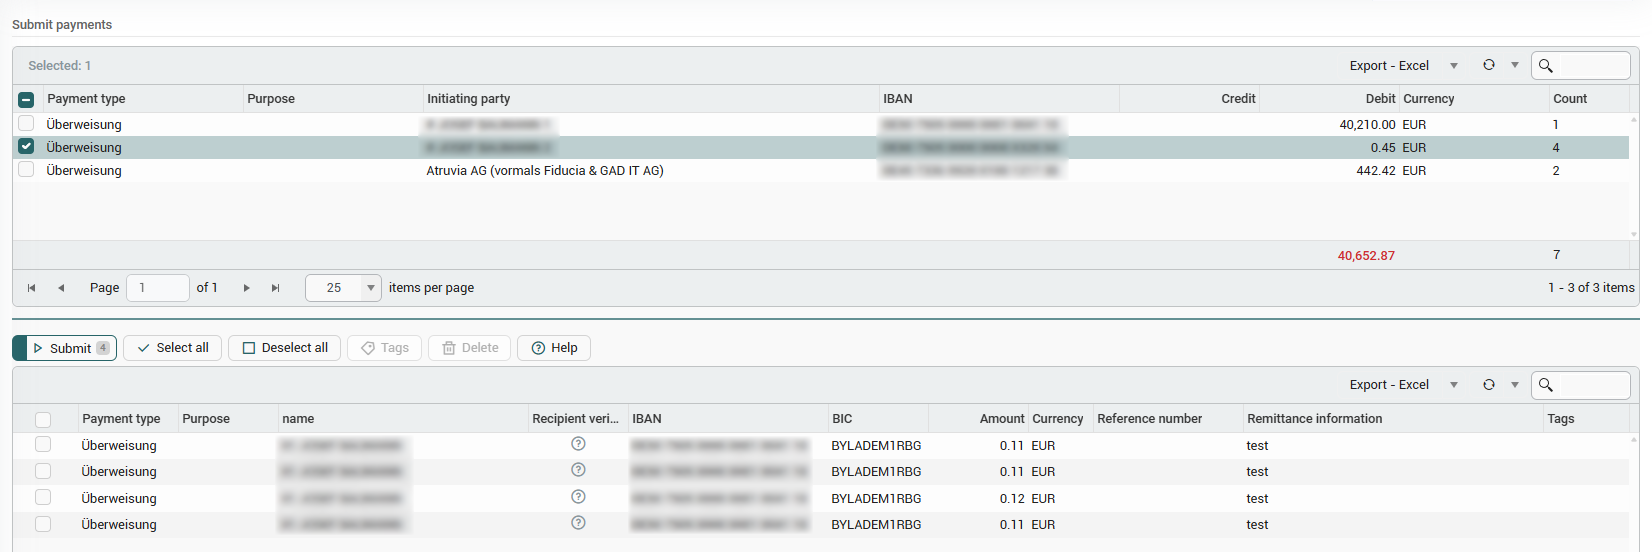
If you have selected one or more groups of payment orders above, you can select the individual payments you wish to transfer in the table below. Then click on Transfer in the toolbar of the bottom table to initiate the transfer.
If you click on the Transfer button in the bottom table without selecting a single payment, all files from the bottom table are transferred at once.
Configure transmission
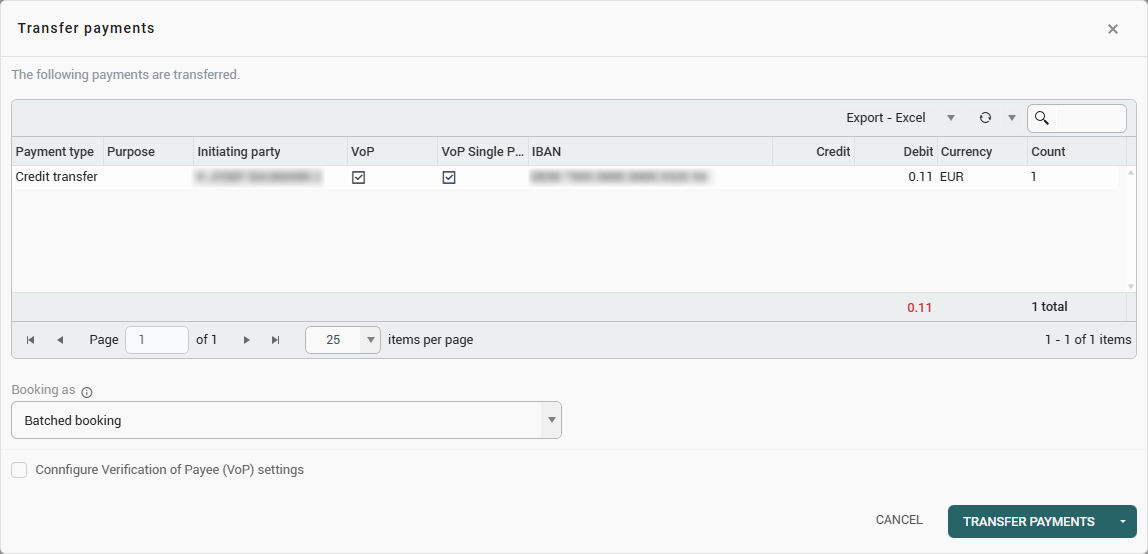
After you have selected the payments to be transferred and clicked on Transfer, you can configure a few more details for the transfer in the transfer window:
Individual or batch booking
In the bottom left at Booking as... you can specify whether the payments are to be transferred individually or as a batch booking. Batch bookings serve to simplify electronic payment transactions. All individual payments that match (same payment method and client account) are combined into one batch booking.
Batch bookings appear bundled as one item on the account statement, the individual payments are not shown. By default, payments are transferred as batch bookings. The use of batch bookings offers several advantages, such as potential savings on fees, the bundling of sensitive individual payments (e.g., in the area of wages and salaries), and the clarity of account statements even with large amounts of data.
The execution of payment orders as individual payments generally requires an agreement with the bank. Without this agreement, the bank will generally ignore this information and automatically book the payment orders as batch bookings.
Configure verification of payee
At the bottom left of the transfer window, under Configure Verification of Payee (VOP) settings, you can check a box to manually configure settings for Verification of Payee (VOP) for this payment.
Select whether you want to perform recipient verification for this payment by checking the box next to Verification of Payee (if this is a single payment/individual booking, check the box next to Verification of Payee for single payments).
By deactivating payee verification, you may waive any liability claims in the event of damage. For more information, see Article 5c of the Instant Payment Regulation.
For documentation purposes, the payment overview shows for each payment whether it was transferred with or without payee verification and which user set this setting.
You can view the result of the recipient verification by calling up open VEU orders in konfipaySign. Payments that are transferred with recipient verification may require further verification before they can be executed. If a recipient name only partially matches (“close match”), you must still authorize this payment manually using konfipaySign before it can be executed.
Carry out transfer
Once you have made all the settings, you can transfer the payments to the bank by clicking on Transfer payments.
Alternatively, you can just create an output file instead of transferring it to the bank. To do this, click on the arrow next to Transfer payments and select Generate output files. In the process, konfipay creates a payment file as it would be sent to the bank - you can then download this file and save it locally on your PC.
No files are transferred to the bank when an output file is created.
Select transmission path
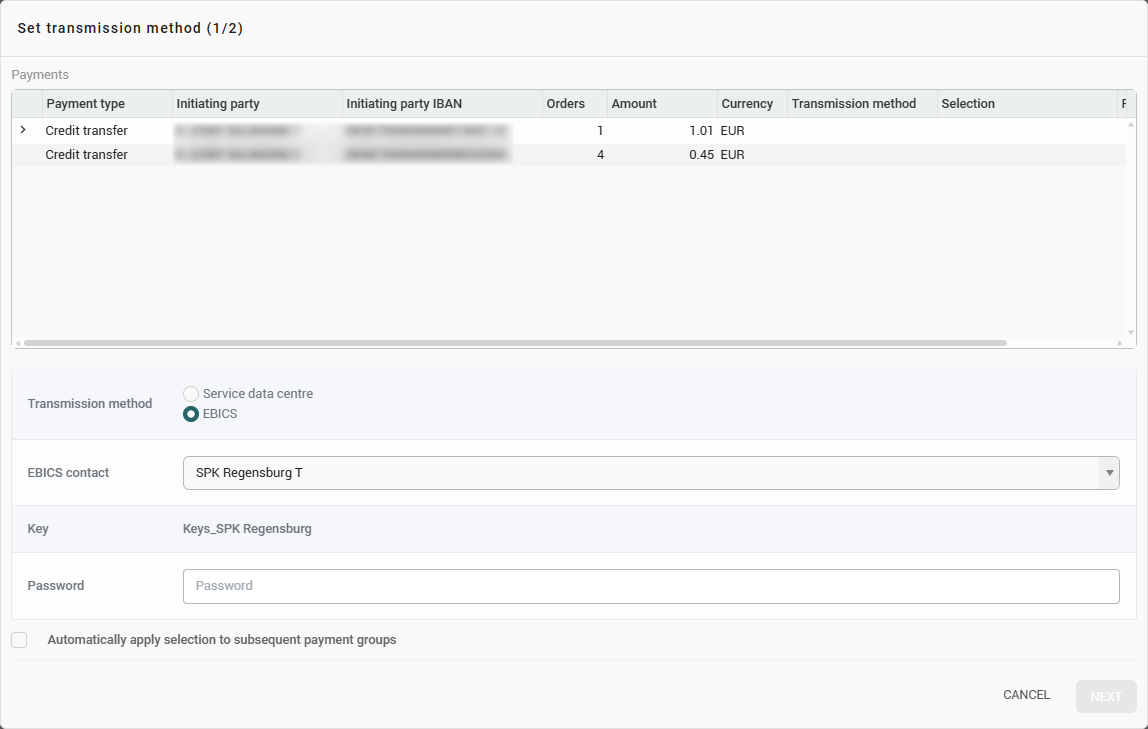
If several EBICS contacts for manual payment transfer are assigned to the ordering party account (see bank account management of EBICS contacts), in the next step you may have to select which transmission path (EBICS or SRZ) and which EBICS contact you would like to use for the transfer.
When transferring multiple batch payments, you can check the box labeled Automatically apply selection to subsequent payment groups at the bottom. This way, you won't have to configure the transfer route separately for each batch, and you can avoid having to enter the same EBICS key password multiple times.
Several criteria must be met for EBICS to be available here as a transmission channel:
-
The EBICS contacts must be fully initialized before they are available for selection for transmission
-
The user must have access to the EBICS keys of the contacts linked to the client account
Enter EBICS password
Depending on the configuration of the EBICS key of the selected EBICS contact, you may have to enter the EBICS password manually for each transfer. Check the automation settings of the corresponding EBICS contactif you want to change this setting.
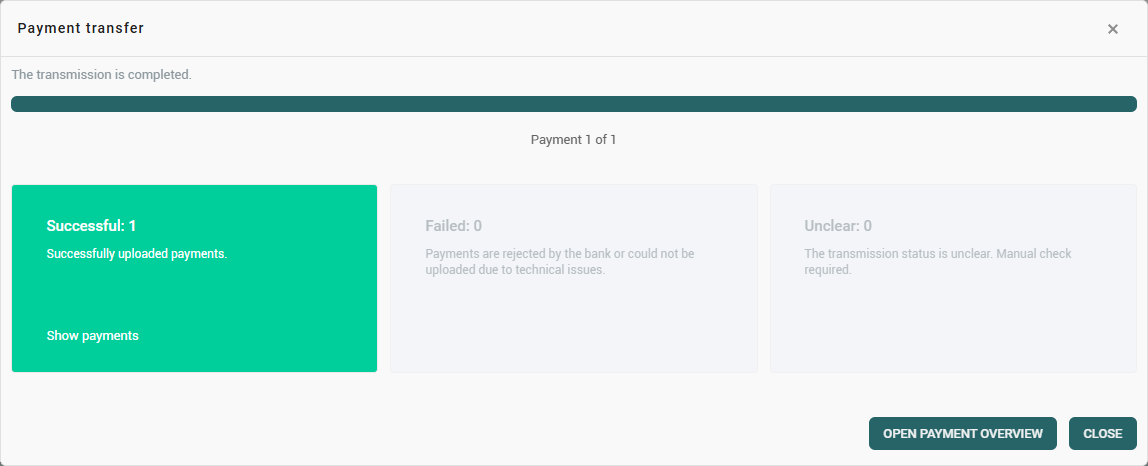
Following finished transfer
Once the transfer of payment files is complete, you will see an overview of the transfer progress. Successfully transferred payments are displayed in green, failed payments in red, and payments with an unclear transfer status in orange. Click View Payments to see the details of a group's payments.
Tags
You can use tags to specifically label and better organize data in konfipay. To edit the tags for a payment, select that payment in the payment overview and click on Tags in the toolbar. You can then add or remove tags. Click Save to apply your changes.
To create a new tag, click the plus icon next to Tags.
If you want to add or edit tags for multiple payments at once, please proceed as follows: Select those payments in the payment overview and click Tags in the toolbar. Then choose which action you want to perform for the tags selected below:
-
Set– the tags are applied to all selected payments. Any existing tags will be overwritten. Please note: If you clickSavehere without selecting a tag, all tags will be removed from the selected payments. -
Add– the selected tags are added to all selected payments, provided they do not already exist. -
Remove– the selected tags will be removed from all selected payments, if they are present.
To remove all tags from a payment, select Set as the action and do not select any tags. When you then click Save, all tags will be removed from the selected payments.
If multiple single payments recorded in konfipay are assigned differing tags, and these single payments are later transferred in one batch payment, the differing identifiers are added to the batch payment, so that the batch payment ultimately includes all the different identifiers of the individually recorded single payments.