
Here you have the option of managing users who are registered in your client. You can add new users or change users that have already been created by selecting the desired user in the list and then selecting the corresponding option at the top of the toolbar:
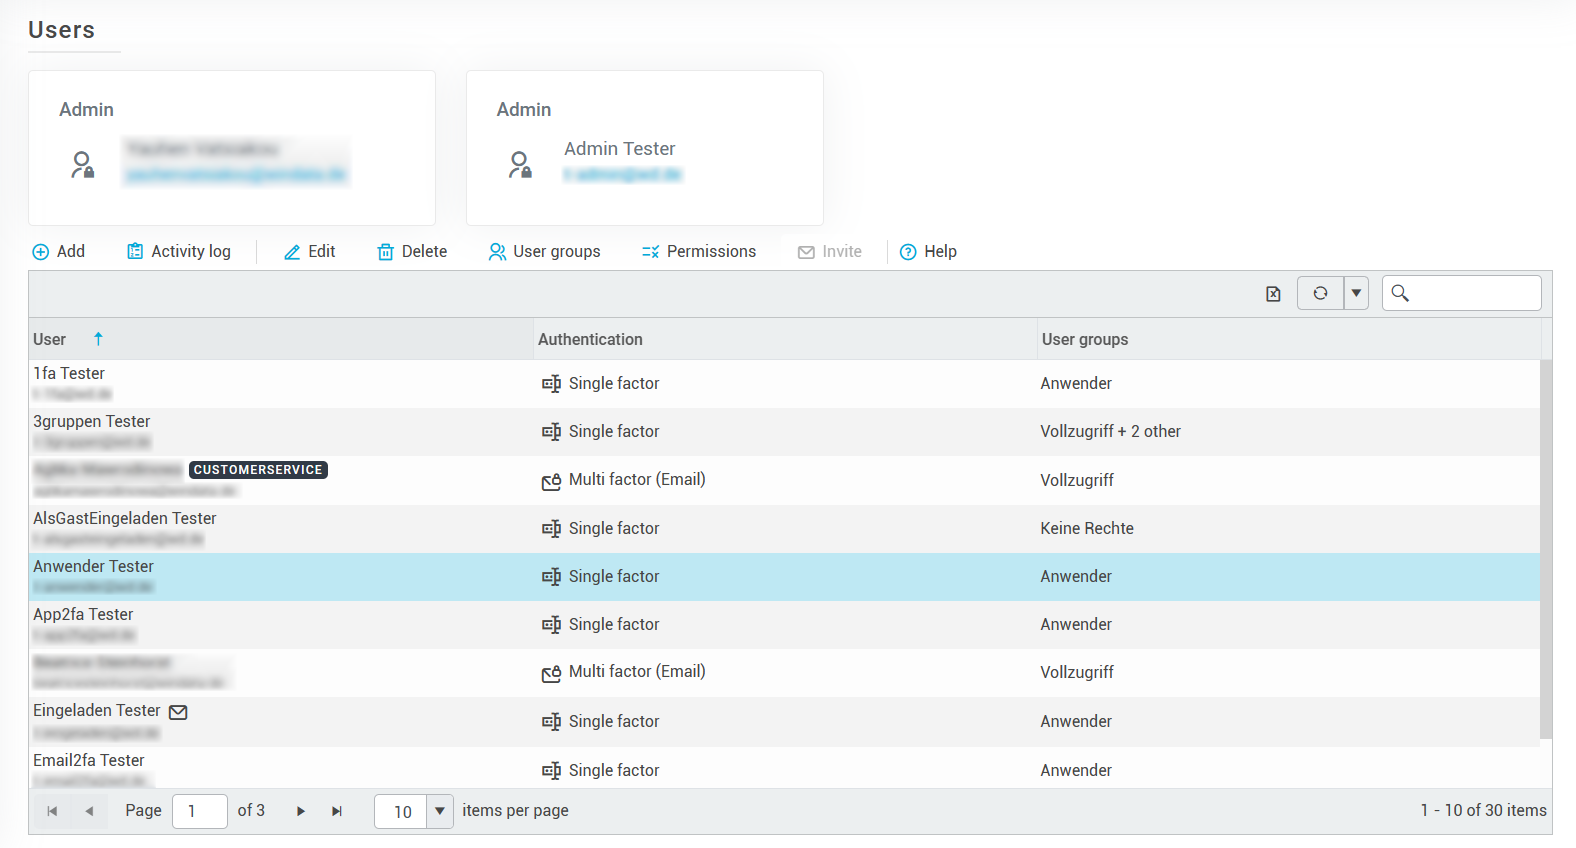
Add user
Here you will find separate instructions on how to create a new user in your client.
Edit user
To edit an existing user, select it in the list and then click on User > Edit. A window then opens with the same setting options as under My account. You can make the same changes there (with the exception of e-mail or password changes - only the user concerned can change these).
Delete user
To delete an existing user, select the user in the list and then click on User > Delete.
Manage user groups of a user
To manage the user groups of a user, select the corresponding user in the list and click on Permissions > User groups. You can then see directly which user groups the user currently belongs to.

Select a user group from the list and click on Add to add the user to the group. With Remove you can remove the user from the group, and with Show permissions you can view the permission scheme of the selected user group.
With the button Remove all you can remove a user from all user groups, and with Reset you can reset all unsaved changes made to the user groups.
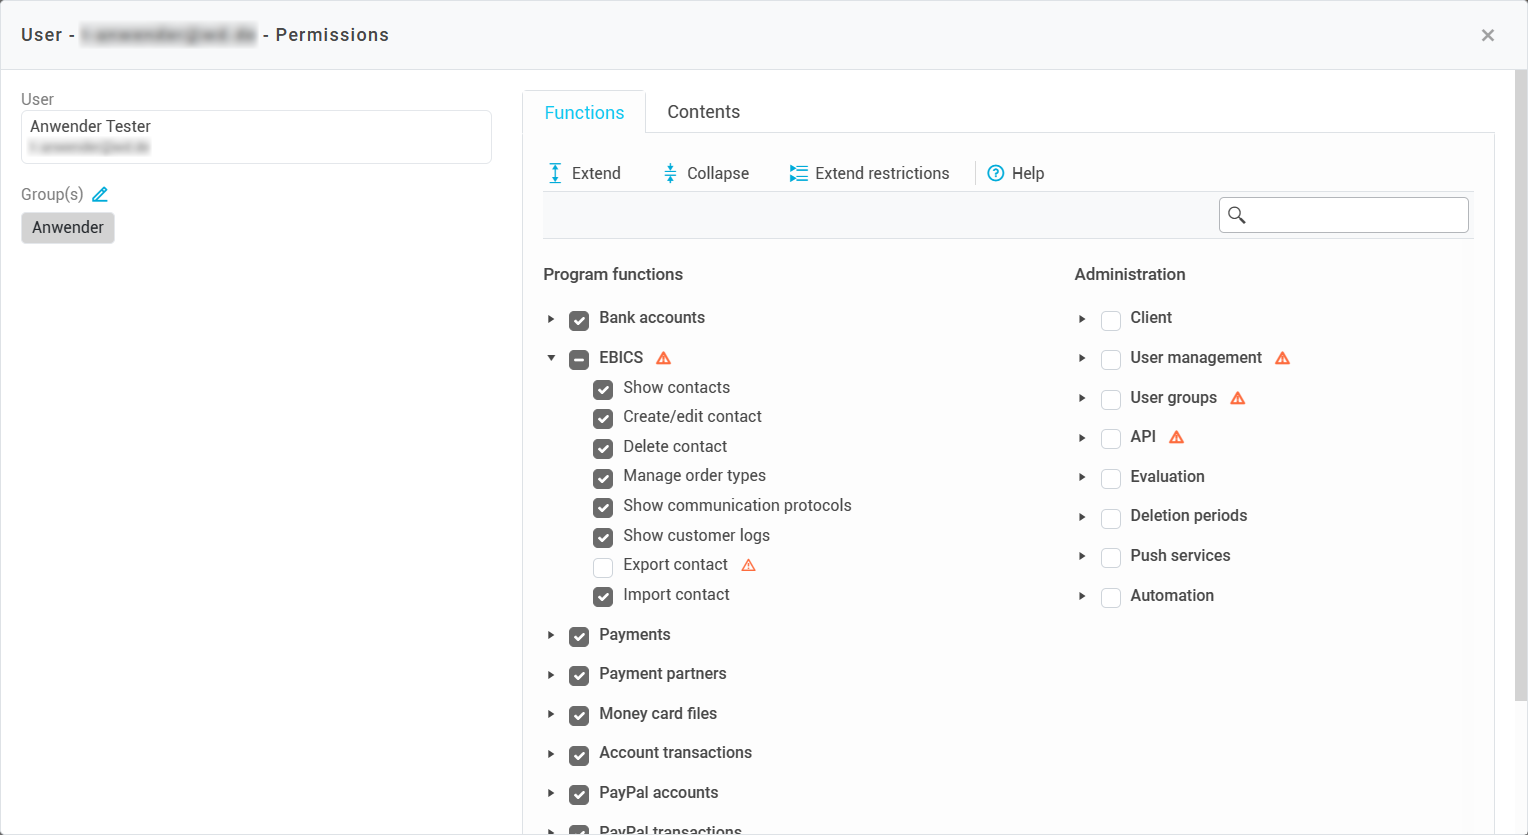
Display a user's permissions
To display the permissions of a user, select the user in the list and then click on Permissions > Show permissions. You will then see on the left which user groups this user belongs to and on the right which permissions they have. You can view the permission matrix of the function restrictions, and under the Contents tab, you can also display the user's content restrictions.
To find out how the permission system in konfipay works and how you can use permissions optimally for your purposes, read the article here.
User activity logs
By clicking on Protocols in the toolbar, you can view two different logs detailing user activity within the client. Under Protocols > Activity log you will find the activity log, which is described in more detail here.
Under Protocols > User logins you will find a detailed list of all login activities within the client, i.e., all successful and failed login attempts by users, along with their IP addresses.
Deactivate and activate users
The administrator of a client can deactivate users. To do this, the administrator selects the relevant user from the list and clicks on User > Deactivate. A deactivated user can no longer log in to konfipay and therefore no longer access the data and functionalities of a client, but their user data is not lost and the user can be reactivated at a later date.
To reactivate a user, the administrator clicks on Inactive users at the top of the toolbar, select the user to be reactivated in the list and click on Reactivate.
Admin role
The administrator has a special role within the users. They do not belong to any user group and therefore cannot be restricted in their permissions. The administrator also has access to functions that are not available to any other user. These include:
-
Managing hardware tokens
-
Deactivating/reactivating users
-
Setting up the client-wide whitelabeling
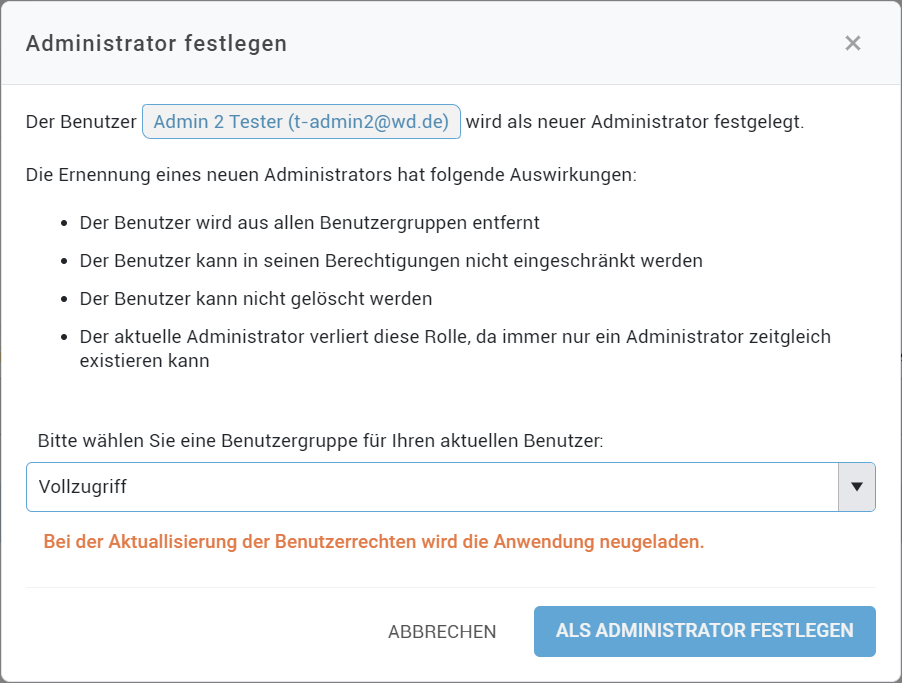
Only one user can be named as administrator for each client. If it is necessary for another user to take on this role, the role can be transferred to another user via the user administration.
To do this, the user who is currently the administrator goes to the user administration and selects the new admin to be appointed from the list of users. The current administrator then clicks on Permissions > Set as administrator in the toolbar to transfer the administrator role to the new user.

The user who previously assumed the role of administrator becomes a regular user. When transferring the administrator role, a user group must be selected for the previous administrator.
The administrator role can only be passed on by the current administrator themselves. If this is no longer possible (e.g. because the user has already left the organization), it is possible to request a transfer by the konfipay customer service. Please use the order for data change.